A welcome email might look simple on the surface, but it’s often the first real conversation your brand has with a new customer. Whether someone just created an account, signed up for your newsletter, or made their first purchase, that moment of excitement is the perfect time to reach out, and automation makes it effortless.
In WooCommerce, setting up a welcome email doesn’t just help you greet new shoppers. It boosts engagement, builds trust, and gently guides customers toward exploring more of your store. The best part? You don’t need complicated tools or coding to make it happen.
In this guide, we’ll walk you through how to create a fully automated welcome email workflow using the WebToffee WooCommerce Marketing Automation App. It’s easy to set up, beginner-friendly, and designed specifically for WooCommerce store owners who want a smooth, hands-off way to nurture new customers from day one.
Why You Should Send Welcome Emails?
Welcome emails are one of the most powerful messages you can send in your entire marketing strategy. When someone joins your store community, that moment is filled with curiosity and excitement. A well-timed welcome email taps into that momentum and builds an immediate connection with your brand.
Here’s why every WooCommerce store should send automated welcome emails:
1. They Get the Highest Open Rates
Welcome emails outperform almost every other type of email. Customers are expecting a confirmation or a hello, so they naturally open and engage with this message more than anything else you’ll ever send. It’s your best chance to make a strong first impression.
2. They Build Instant Trust
New shoppers want reassurance that they’ve made the right choice. A friendly welcome email shows your brand is professional, organized, and attentive. It sets the tone for a positive customer experience right from the start.
3. They Guide Customers Toward Their Next Step
Think of this email as a quick onboarding experience. You can use it to: introduce your brand story, recommend popular products using a product recommendations plugin to showcase bestsellers or new arrivals, share helpful resources, or direct them to key pages like your shop or account area.
This simple nudge can lead to faster conversions and more engaged shoppers.
4. They Increase First-Purchase Rates
A welcome email with a small incentive, like a first-order discount or free shipping, often encourages new visitors to complete their first purchase. Tools like WooCommerce Smart Coupons make it easy to create these targeted offers, from BOGO deals to auto-apply discount codes, which you can then include directly in your welcome emails.
5. They Strengthen Long-Term Customer Relationships
A warm welcome creates a sense of belonging. Customers who feel acknowledged are far more likely to come back, explore more products, and eventually become loyal buyers. You can take this a step further by offering WooCommerce gift cards as part of your welcome campaign even a small store credit gives new customers a reason to return and make their next purchase.
6. They Work Automatically in the Background
Once you set up a welcome email automation, it keeps running on its own. Every new customer gets a personalized welcome without you having to lift a finger, saving you time while creating a consistently great experience.
How to Automate Welcome Emails in WooCommerce?
Automating welcome emails in WooCommerce is much easier than most store owners expect, especially when you’re using a tool designed specifically for WooCommerce. With the WebToffee Automate Woo App, you can create a fully personalized welcome email workflow without touching a single line of code.
Follow the steps below to create a welcome email automation workflow on your WooCommerce store:
Step 1: Install WebToffee eCommerce Marketing Automation Plugin
- Log in to your WordPress admin account, and then go to Plugins and click on Add New.
- Search for the WebToffee eCommerce Marketing Automation plugin in the search bar.
- Once you find the plugin, install and activate it on your website.
Step 2: Connect WooCommerce with WebToffee Marketing App
- After activating the plugin, go to WebToffee Marketing and select Connector from the sidebar menu.
- Click on the Connect now button to start connecting your website with the WebToffee Marketing app.
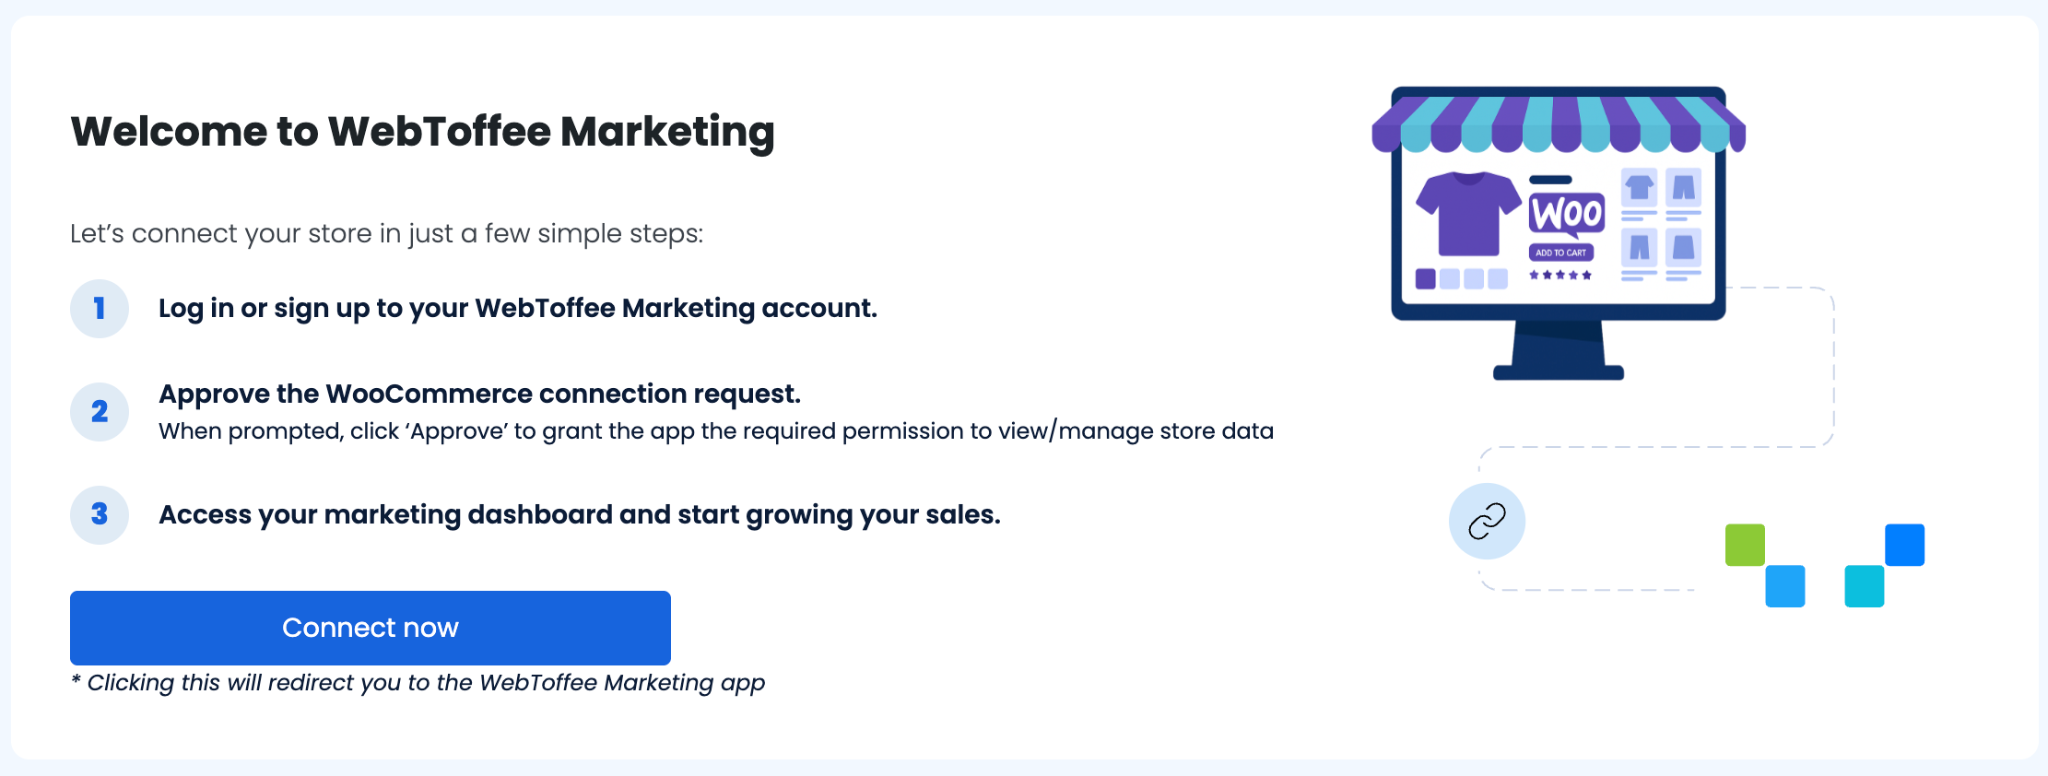
- Follow the on-screen instructions to complete the signup process.
Step 3: Enable Welcome Popups for WooCommerce
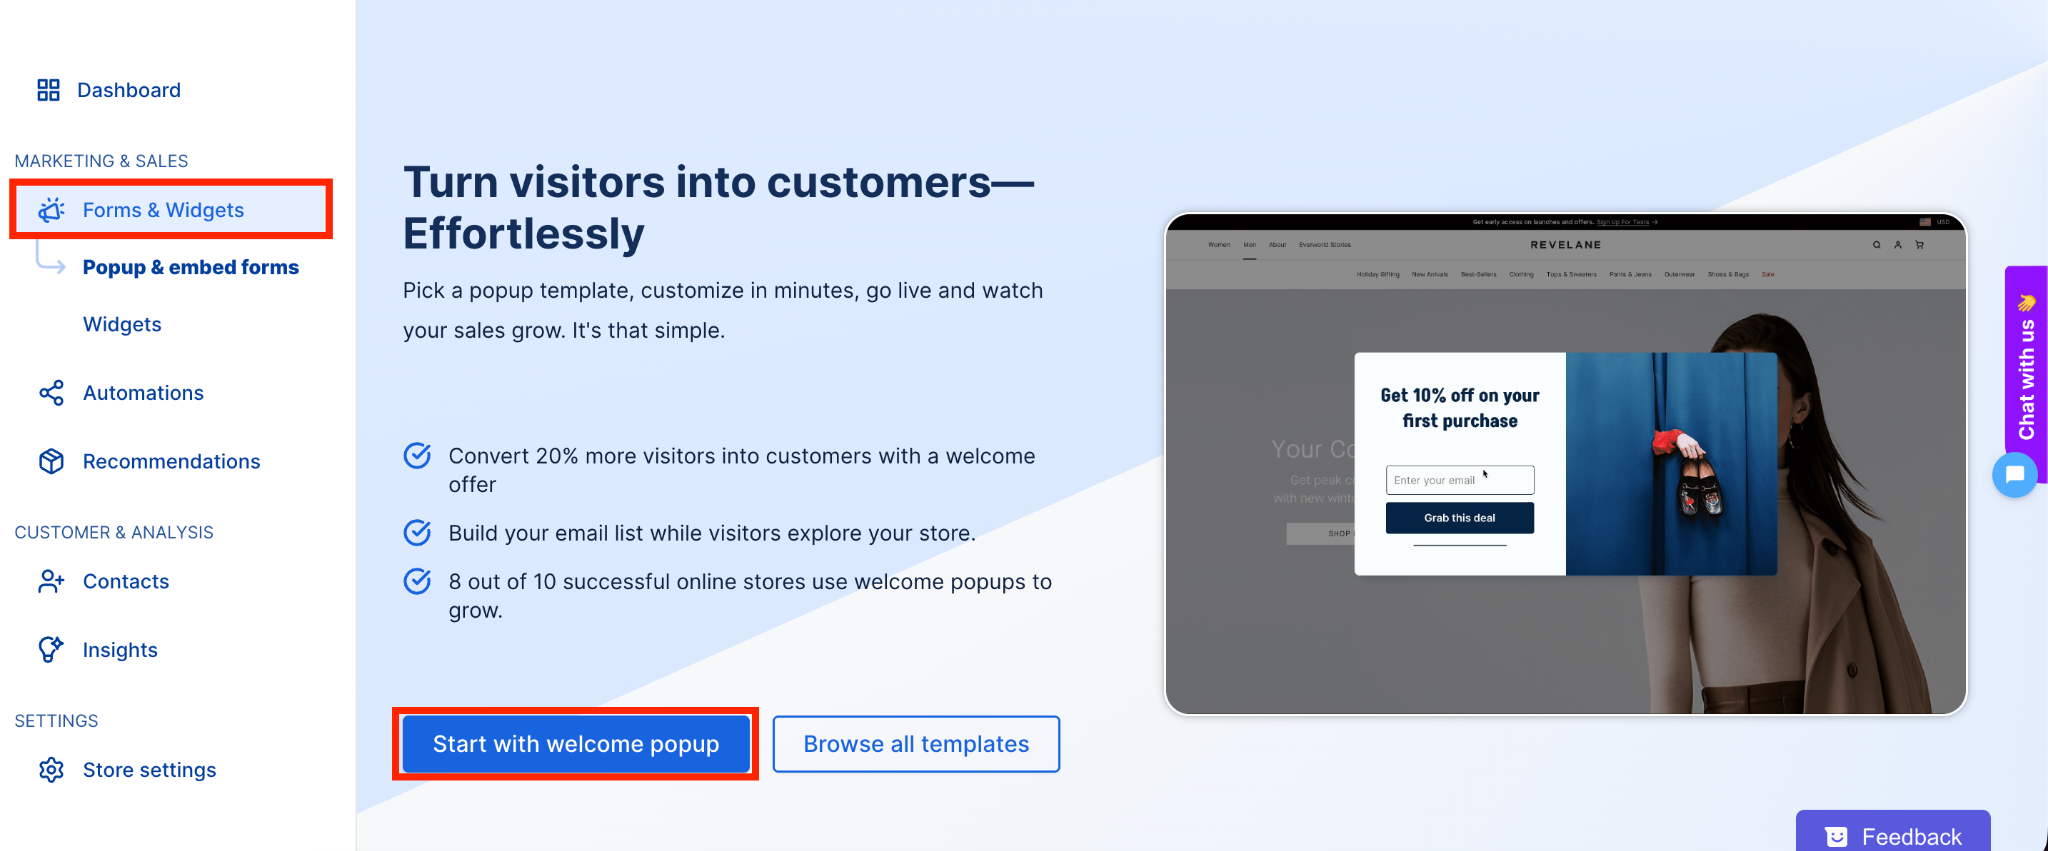
- From your dashboard, go to Marketing & Sales > Forms & Widgets.
- Click Start with welcome popup to begin creating your welcome offer popup.
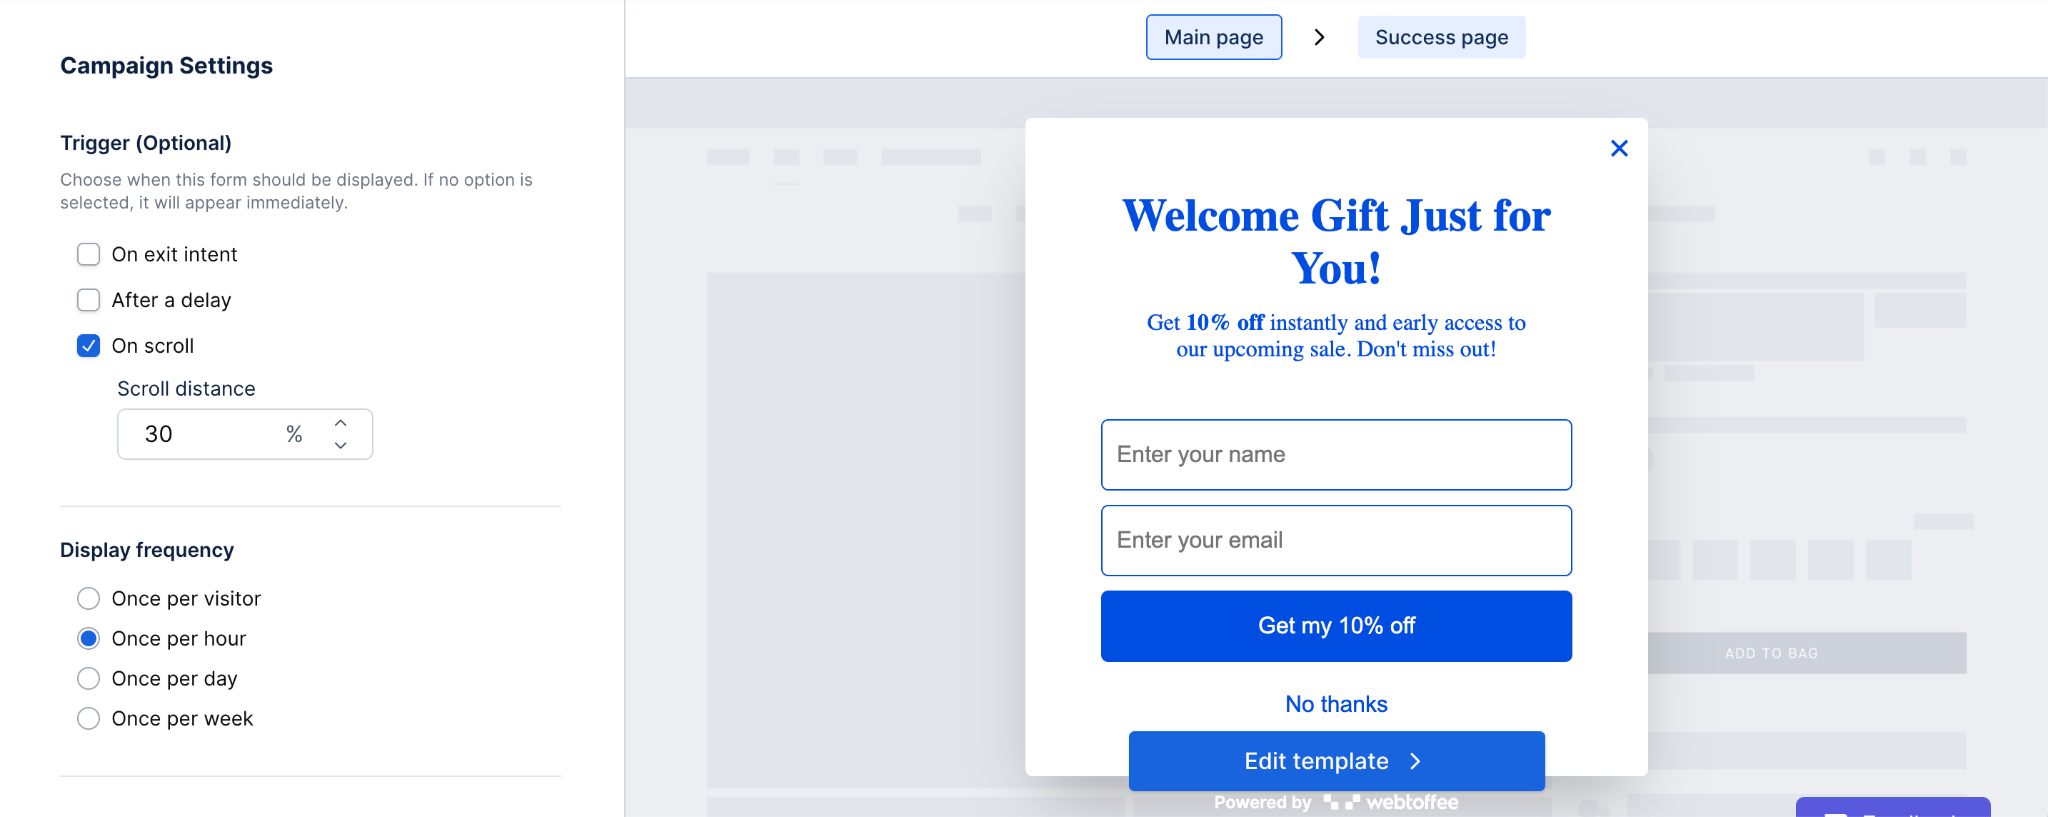
- Under Campaign Settings, choose your preferred Trigger (Optional) to decide when the popup should appear.
- You can select from On exit intent, After a delay, or On scroll.
- If you’ve selected On scroll, set the Scroll distance to define how far a visitor must scroll before the popup appears (for example, 30%).
- Next, under Display frequency, choose how often the popup should appear to visitors
- You can choose Once per visitor, Once per hour, Once per day, or Once per week.
- Click on Edit template to edit the popup template.
Step 4: Edit Welcome Popup
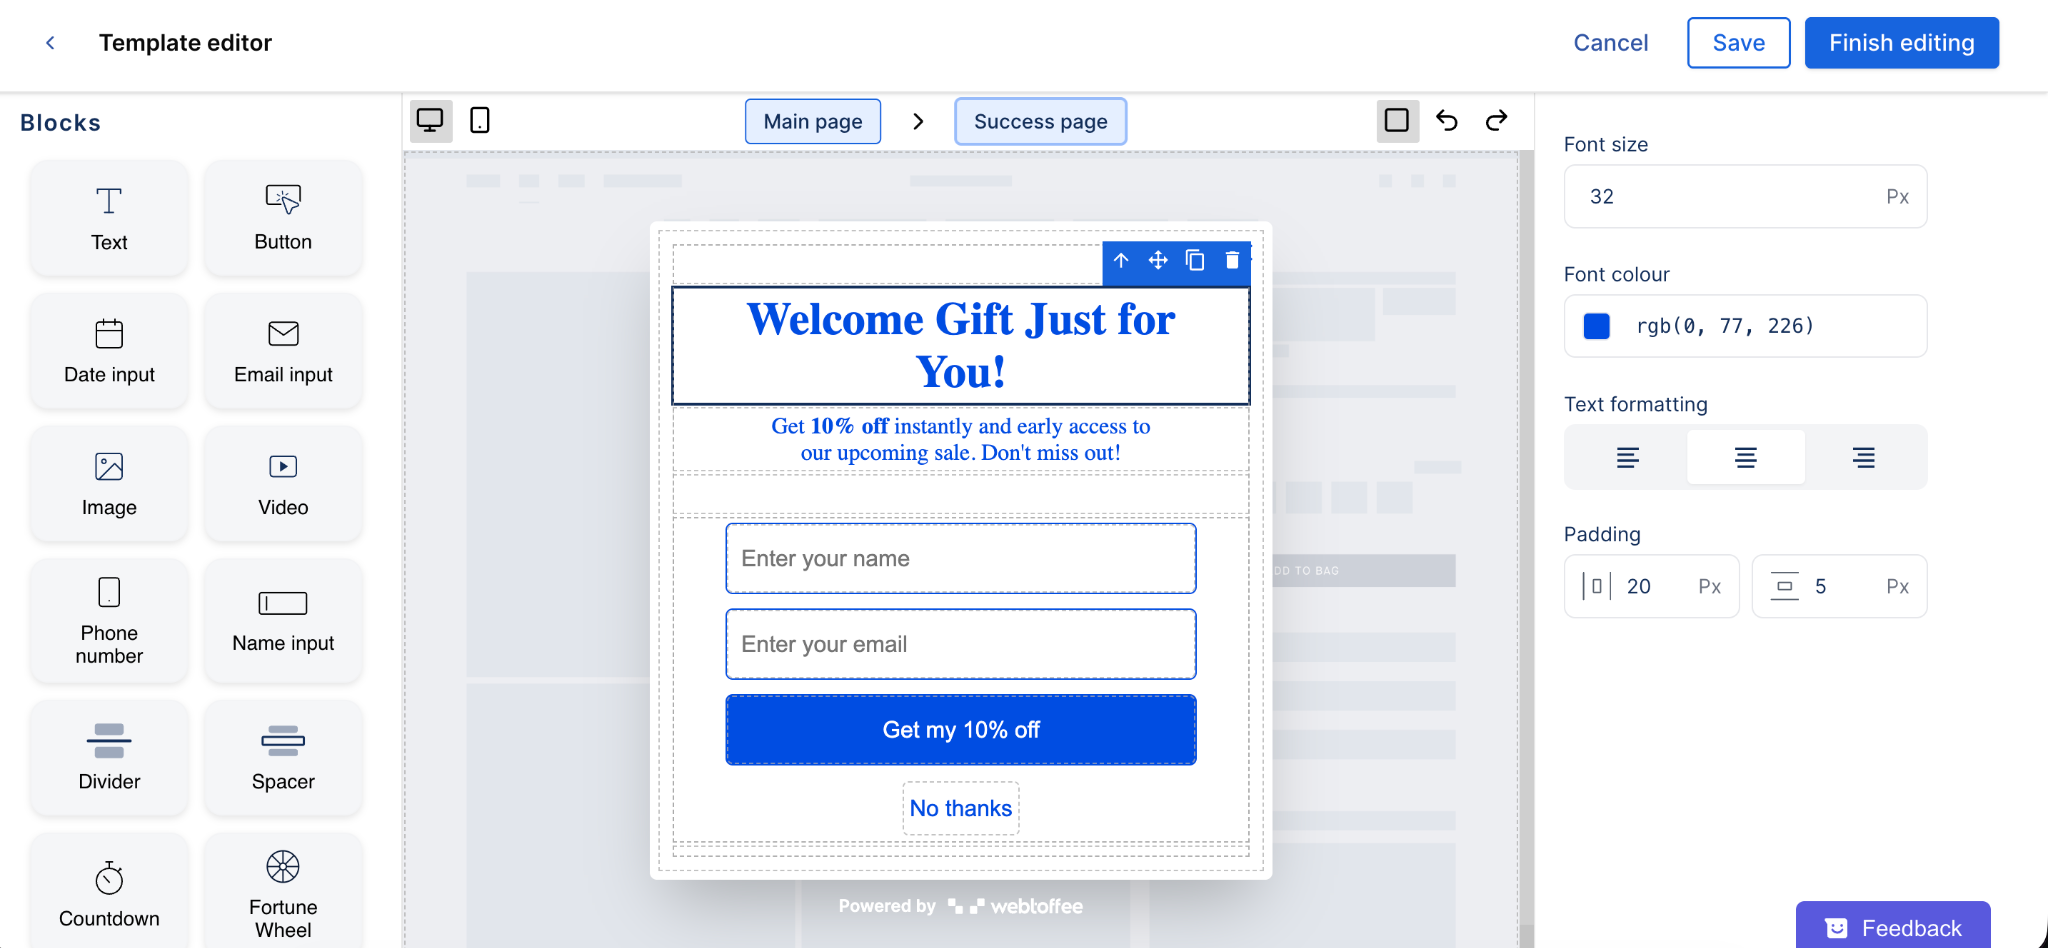
- In the Template editor, customize your welcome popup using the available Blocks on the left panel, such as Text, Button, Image, Email input, and more.
- Edit the text fields directly to match your message, for example, update the headline, description, and button text.
- Adjust design settings on the right panel, including font size, font colour, text formatting, and padding, to match your store’s branding.
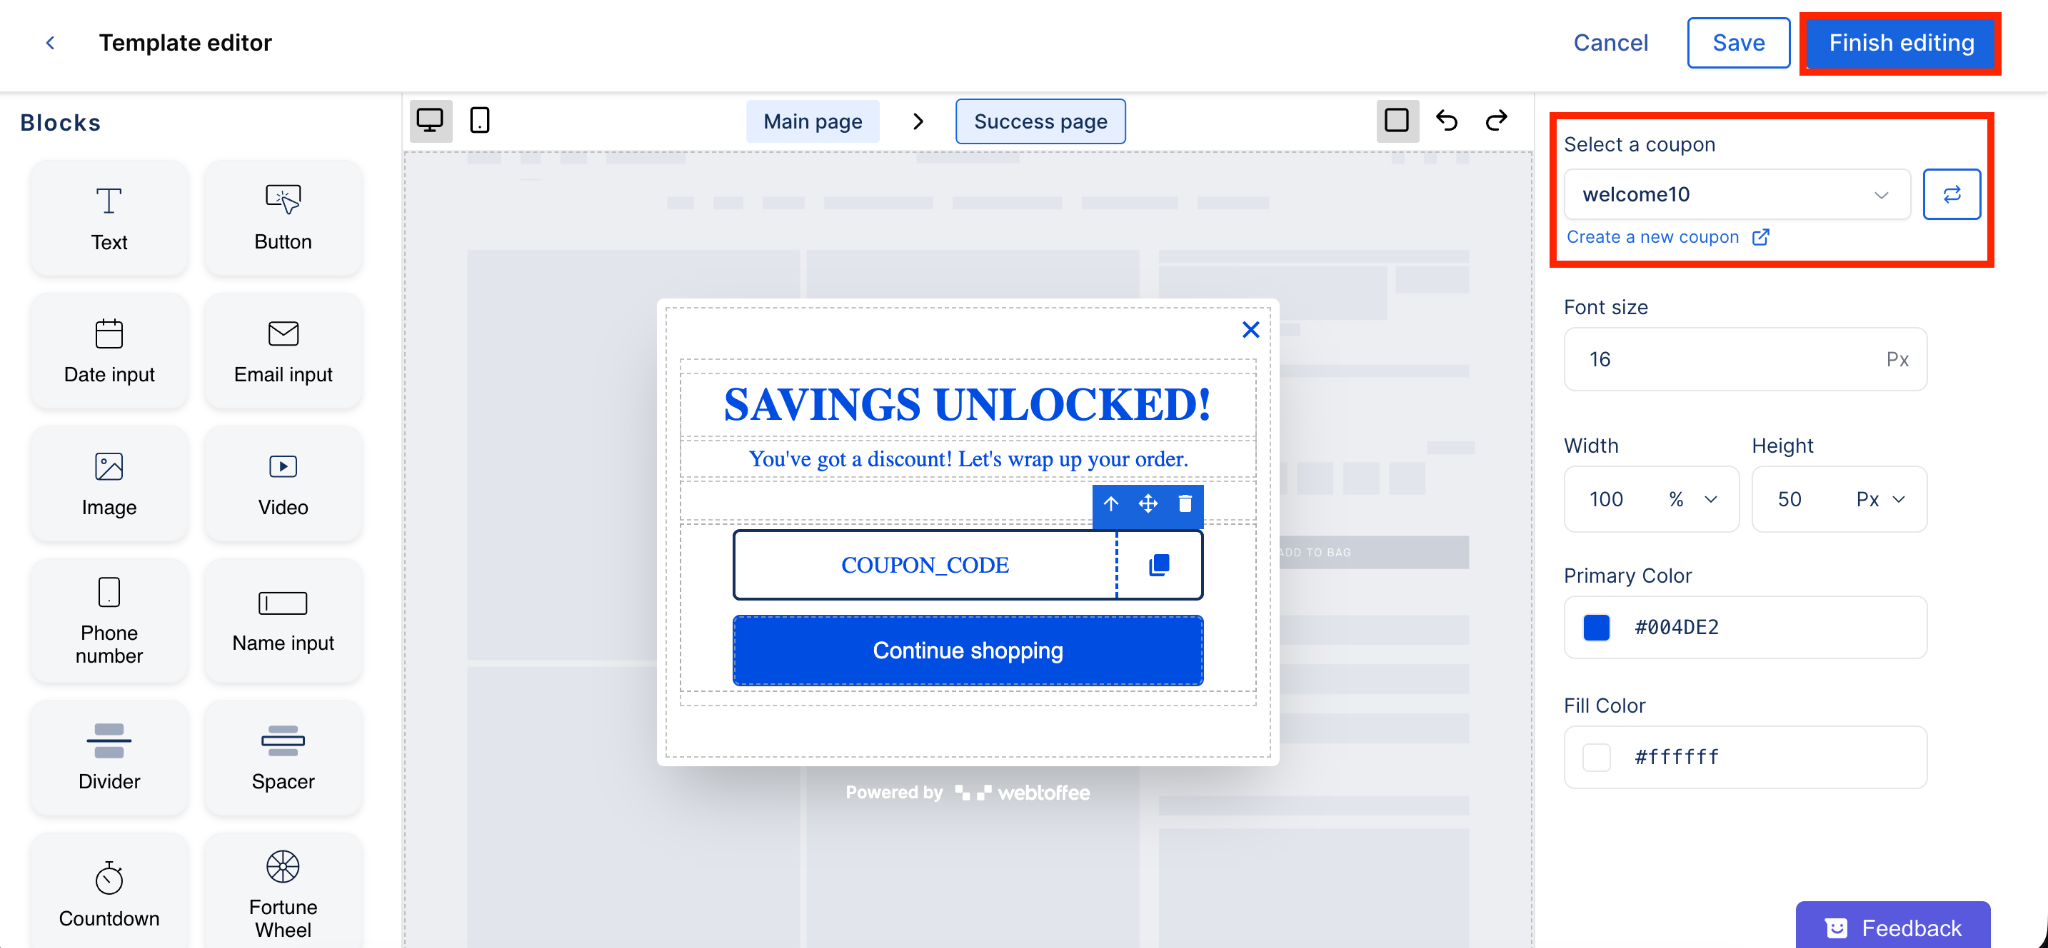
- Switch to the Success page tab to design what customers will see after submitting the form.
- Add or edit text blocks to display a confirmation message like “SAVINGS UNLOCKED!” and include a coupon code section.
- On the right panel, under Select a coupon, choose an existing coupon (for example, welcome10) or click Create a new coupon if you’d like to generate a new one.
- Once you’re satisfied with the design, click Save or Finish editing to apply your changes.
- Then, click on Publish to save the popup.
Step 5: Create Welcome Email Automation Workflow
- Now, go to the Automations tab and select Welcome email automation.

- In the automation builder, start by setting the Trigger for your workflow.
- Under Select campaign, pick the campaign you want to connect. We’ll select Welcome campaign (the one we just created)
- Check the box for Skip contacts who have been in this workflow to avoid sending duplicate emails, and set the time duration (e.g., 1 day).
- Click Add filters to set entry conditions based on specific trigger attributes.
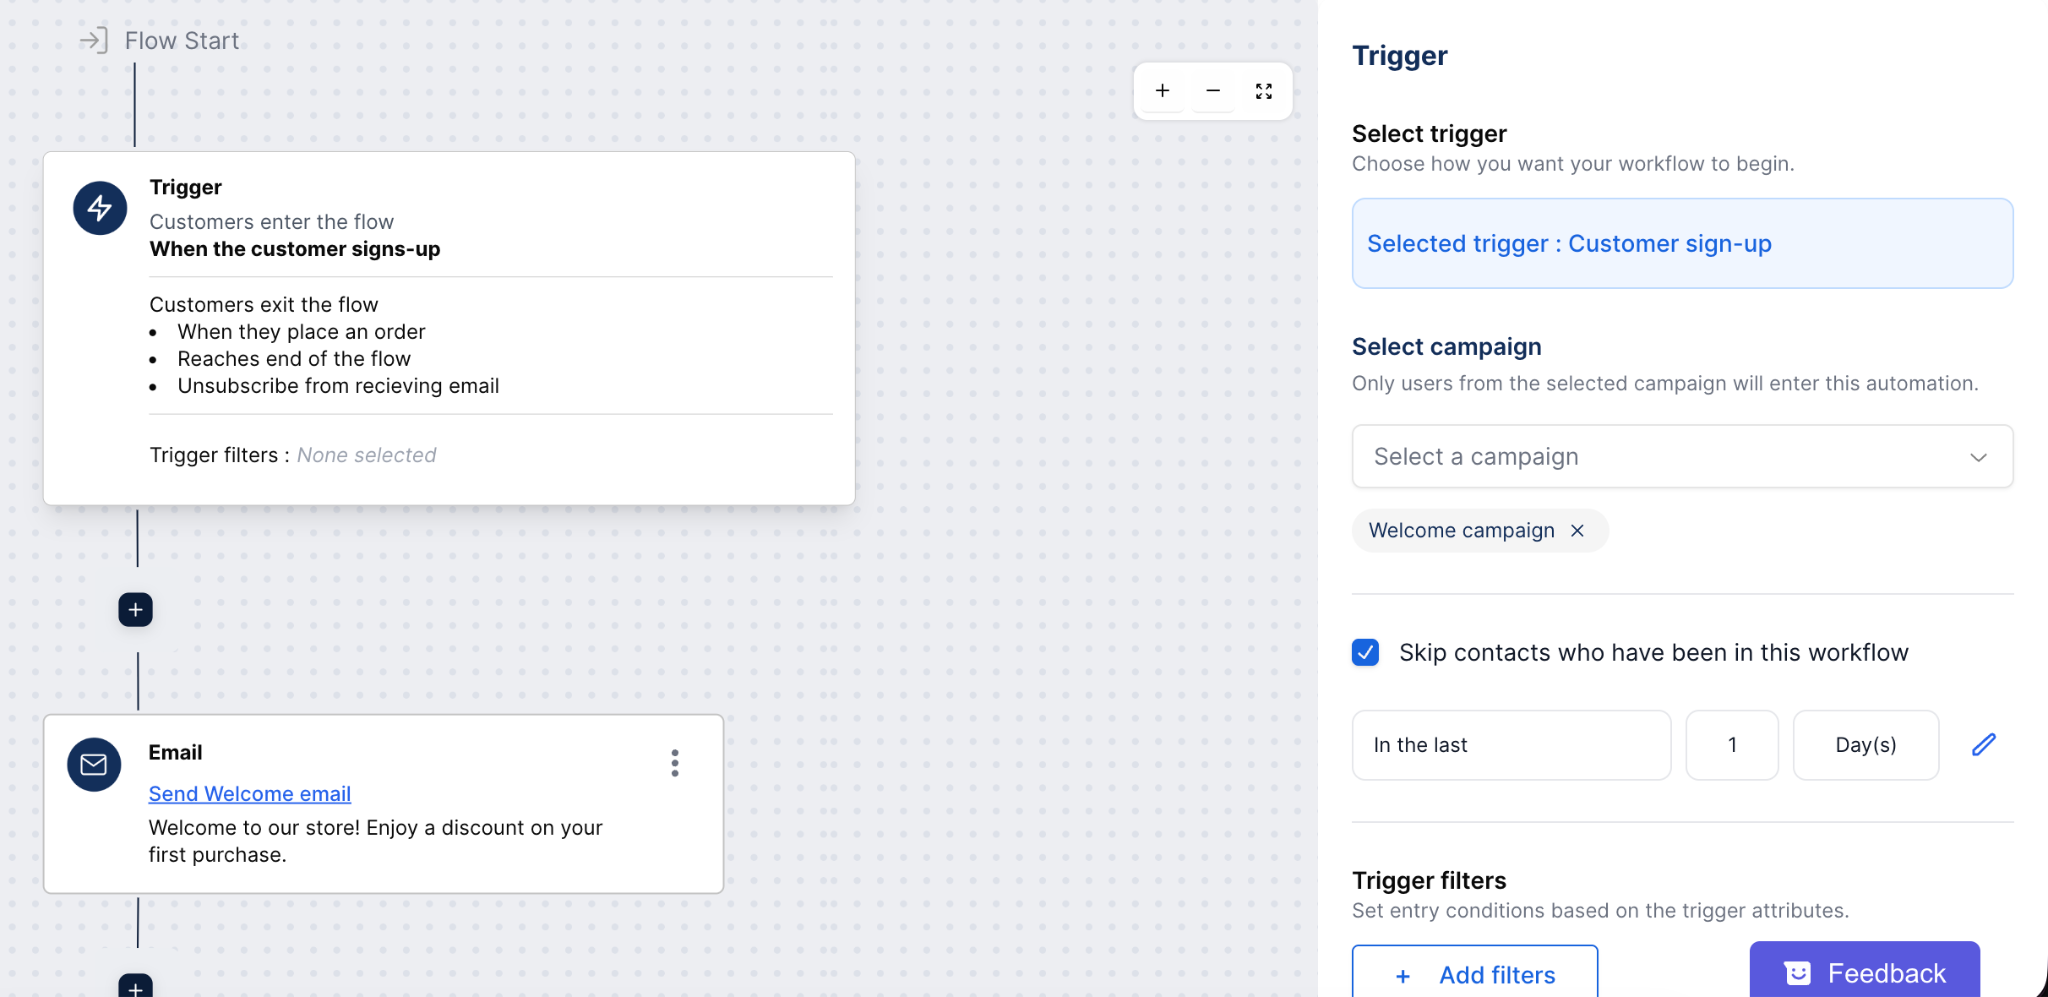
Now, click on the email to edit the email content and template.
Step 6: Edit Email Content and Template
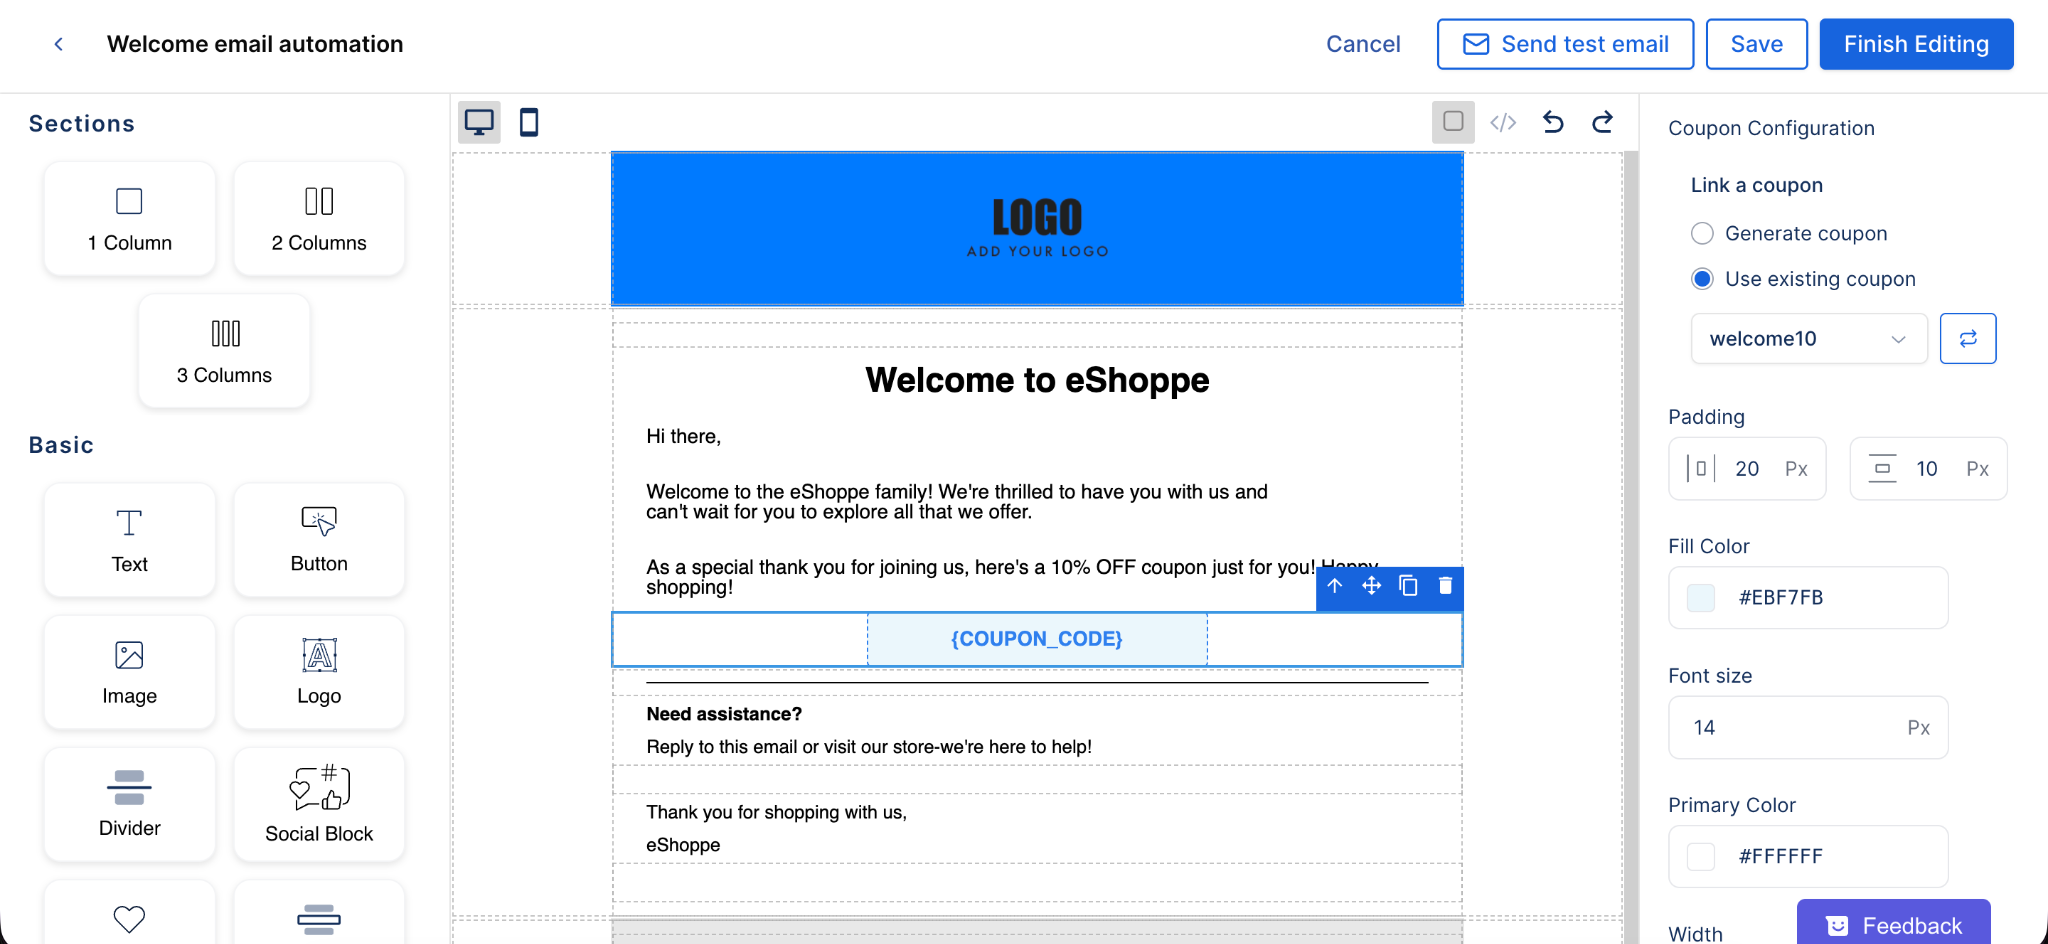
- In the Welcome email automation editor, customize your email layout using blocks on the left panel, such as Text, Image, Logo, and Button, and more.
- Add your store logo at the top and personalize the message with a friendly greeting and short introduction.
- Include a coupon block within the email to reward new customers.
- On the right panel, under Coupon Configuration, choose Use existing coupon and select your desired coupon (for example, welcome10).
- Adjust the Padding, Fill Color, and Font size to match your email’s design style.
- Once you’re satisfied, click Send test email to preview it, then Save or Finish Editing to finalize your automation email.
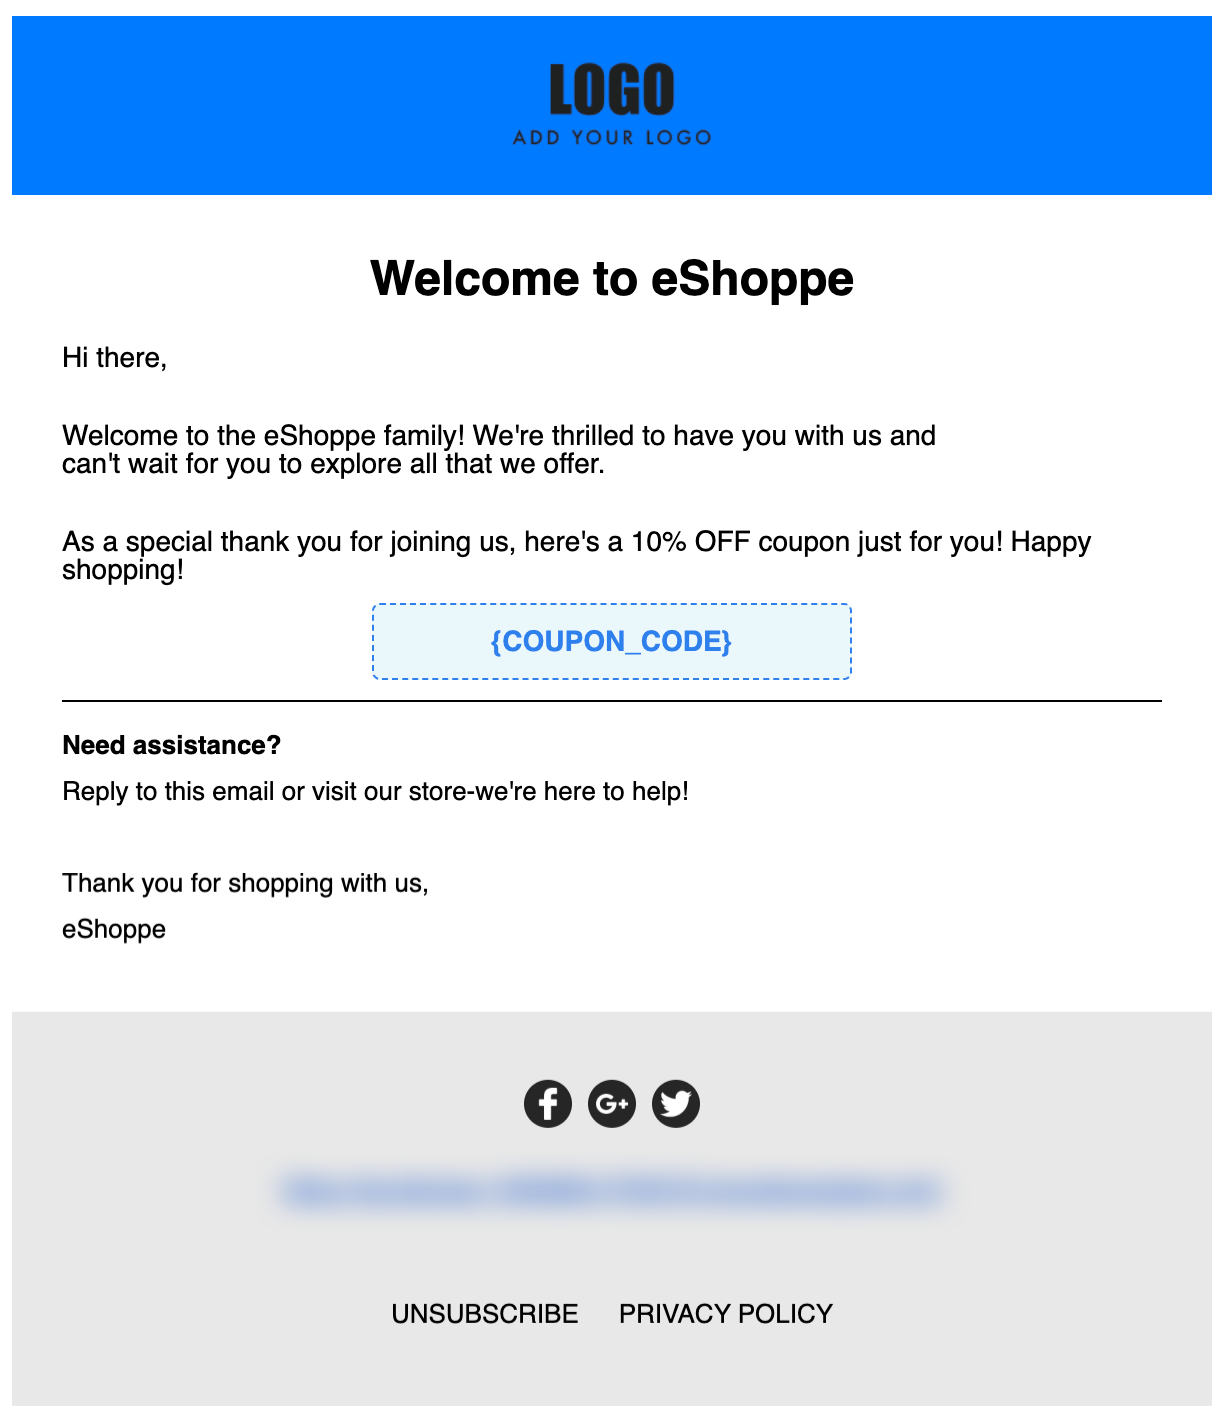
Here’s a preview of the email.
Frequently Asked Questions
1. What is a welcome email in WooCommerce?
A welcome email is the first message your customer receives after signing up, making a purchase, or subscribing to your store. It introduces your brand, thanks them for joining, and can include incentives like discounts or helpful links to get them started.
2. Can I send a welcome email automatically in WooCommerce?
Yes, you can! With the WebToffee WooCommerce Marketing Automation App, you can easily create automated welcome email workflows that send messages as soon as a customer signs up or makes their first purchase.
3. Do I need any coding skills to set up a welcome email automation?
Not at all. The WebToffee Email Marketing App is completely beginner-friendly and uses a visual drag-and-drop builder. You can design and automate your welcome emails without writing a single line of code.
4. Can I include discount coupons in my welcome emails?
Absolutely. You can add personalized coupon codes (like WELCOME10) directly in your email templates. The WebToffee Marketing App even allows you to link existing coupons or create new ones on the spot.
5. What triggers the welcome email to send automatically?
The automation is triggered when a customer signs up, subscribes, or completes their first order, depending on the trigger you set while creating your workflow.
6. Is email marketing still relevant in 2026?
Absolutely. Email marketing remains highly relevant in 2026, especially when you use it smartly. According to recent email marketing statistics, welcome emails continue to outperform all other campaign types, with an average open rate of 83.63%, making them a powerful tool for creating strong first impressions and building lasting customer relationships.
Conclusion
Creating a welcome email automation in WooCommerce isn’t just about sending a “hello”, it’s about building a lasting connection with your customers from the very first interaction. By automating this process using the WebToffee WooCommerce Marketing Automation App, you can effortlessly greet every new customer, share exclusive offers, and guide them toward their next purchase.
With easy setup, customizable templates, and smart triggers, you can ensure every new subscriber or shopper gets a consistent, personalized experience. And since welcome emails have the highest engagement rates across all campaigns, this small step can make a big difference in boosting conversions and customer loyalty.

Leave a Reply