
Have you ever encountered an HTTP error when uploading an image to WordPress? This usually happens when you’re uploading files to your WordPress site using the media uploader.
Sometimes the image is uploaded but you still encounter an error. This doesn’t happen quite often but when it does, it’s very frustrating. There are many reasons why this error could occur.
In this article, I’m going to show you how to fix the HTTP error while uploading images in WordPress.
How Does The HTTP Error Look Like?
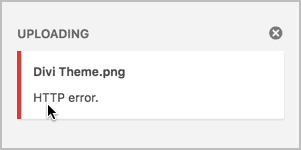
This is how the HTTP error looks like when you’re uploading a file in your media library. The worst thing about this error is that it doesn’t specify any reason as to why this error occurred.
You have to guess what caused the error and fix it. Luckily, since almost every WordPress user has encountered this error at least once, there are many solutions that can fix this error quickly.
Let’s get into the details and fix this error.
How To Fix Images HTTP Error In WordPress
Solution 1. Check If The Error Is Temporary
Often times, this error is temporary. To check if the error encountered is temporary, try to upload the file once again on a new tab.
If the file is uploaded successfully, this means that the error was temporary.
But if you’re still not getting any success in uploading the file, try renaming the file. Many WordPress users also recommend changing the file format and then uploading the image again.
Lastly, remove the apostrophes and semicolons from your image file name. This also fixes the problem quite often.
Here are the steps you can follow to check if the HTTP error is temporary.
- Upload the file again on a new tab
- Rename the file
- Change the file format
- Remove characters such as semicolons and apostrophes from the image file name
If the problem still persists, it means that the error is not temporary and there might be something else causing the error.
If that’s the case, continue reading for more solutions.
Solution 2. Deactivate Plugins
The HTTP error is also encountered after uploading a new plugin. If you’ve uploaded any plugin recently, try deactivating and then uploading the image again.
The plugins that are often the suspect are speed and image optimization plugins. You can try deactivating these plugins to see if your problem is fixed.
Also, if you already have an image optimization plugin installed, try deactivating it too.
If the error disappears, you should look for another image optimizer plugin. Or you can report this error to the plugin developer and request them to fix the problem caused by the plugin.
However, if the problem still occurs, check the other solutions given below.
Solution 3 – Increase WordPress Memory Limit
This is one of the most common causes of this error and if you’re a new WordPress user, this is probably why you’re facing this error.
The HTTP error is caused because of the lack of memory limit available for use. You can easily fix this by increasing the memory limit of the server.
To do this, you’ll simply have to add the following line to your wp-config.php file.
define( 'WP_MEMORY_LIMIT', '256M' );Here’s what this line of code does:
It increases the memory limit of WordPress to 256MB. This allows you to upload files of larger sizes without any error.
This should fix your problem, but if you’re still encountering the error, you may want to read further for more solutions.
Solution 4 – Edit The .htaccess File
The .htaccess file controls where the requests go among other functions and it resides in your WordPress root folder.
With this method, you can limit the number of threads for image processing. Usually, multiple threads are used for faster processing. But, this sometimes results in the HTTP error.
To fix this, you can limit the control to just a single thread for processing images. This can be done by adding the following line in your .htaccess file:
1 SetEnv MAGICK_THREAD_LIMIT 1After doing this, try uploading your file once again. If the problem still persists, add a few more lines of code in your .htaccess file.
<IfModule mod_security.c>
SecFilterEngine Off
SecFilterScanPOST Off
</IfModule>
This should hopefully fix the error, but if the error is still not fixed, continue reading for a few more solutions that would definitely fix the problem.
Solution 5 – Change Your Default Image Editor Library In WordPress
In the previous solution, we added a line of code in the .htaccess file to limit the resources used by Imagick.
This is a module in PHP used for handling images. Another such module is the GD library. You can use any one of them.
Imagick is famous for running into many memory issues causing HTTP errors while uploading files. Changing your default image editor library will fix all the problems you’re facing.
To switch to GD library, simply add the following code in your functions.php file.
function hs_image_editor_default_to_gd( $editors ) {
$gd_editor = 'WP_Image_Editor_GD';
$editors = array_diff( $editors, array( $gd_editor ) );
array_unshift( $editors, $gd_editor );
return $editors;
}
add_filter( 'wp_image_editors', 'hs_image_editor_default_to_gd' );<code></code>
Save your changes and upload the file once again. This should fix the problem as we covered all other solutions above.
However, here are some more solutions to help you get rid of this error.
- Change your theme – Change your theme and then upload the file. If the problem is fixed, contact the theme developer.
- Check your PHP version – Make sure you’re using PHP version 5.2.4.
- Switch browser – Switch to another browser and try uploading the image.
- Clear cache – If nothing works, clear the browser cache and then upload the image.
Conclusion
Encountering the HTTP error while uploading images is definitely not what you want. Hopefully, this article helps you fix the error forever.
If you’re still encountering the error after trying all the solutions mentioned in this article, you should try contacting your hosting provider and ask for their assistance. But I’m sure that the solutions mentioned above will fix your error.
Lastly, if you’ve encountered this error before and fixed it, comment below and share with us what you did to fix the error.

Leave a Reply