
Do you want to build a multi-vendor marketplace in WordPress? Building your own eCommerce website has never been easier.
With WordPress, you can create advanced and highly complex eCommerce marketplaces without any problems.
And if you want to create an online marketplace like Amazon, Etsy, or eBay, then you’re in the right place!
In this guide, I’ll be showing you step-by-step how you can build your own multi-vendor marketplace in WordPress.
Let’s get started.
What is a Multi-Vendor Marketplace?
A multi-vendor marketplace is simply a storefront with multiple sellers selling their products. Big eCommerce websites like Amazon and eBay are perfect examples of a multi-vendor marketplace.
In these marketplaces, each seller can create and sell their products. They have full control over their products including their pricing.
A multi-vendor marketplace is beneficial for both the marketplace owner and the seller. As a marketplace owner, you’ll get an additional income stream by collecting commissions for each product sold on your marketplace.
For sellers, it becomes easy to sell their products without worrying about the technical aspects of setting up a website or store. They just sign up on your marketplace and start selling.
This is a win-win situation for both parties involved which is why there are so many multi-vendor marketplaces thriving.
Things You’ll Need To Build A Multi-vendor Marketplace
Setting up your own multi-vendor marketplace in WordPress isn’t complicated. But you still need to be aware of the things required to set up such a marketplace.
Here’s what you’ll need to build a multi-vendor marketplace:
Domain & Web Hosting
If you don’t have a website already, then you’ll have to create one. For that, you’ll have to purchase a domain name and web hosting.
If you don’t know what these two are, don’t worry. Here’s a short definition:
A domain name is the address of your website that users will type in their browsers to visit your website. Just like people need an address to visit your house, a domain name is needed to visit a website.
Now, once you have a domain name, you also need web hosting.
Web hosting is where your website lives. It’s essentially a computer or a server where all your website’s files are stored.
We’ll come back to this later in the article. For now, let’s talk about the second requirement you’ll need to create your multi-vendor marketplace.
WordPress with WooCommerce
You might already know that WordPress is the best content management platform out there. It currently powers over 40% of the websites on the Internet.
WordPress is perfect for anyone who wants to start their own website. And if you want to start an eCommerce site, pair WordPress with WooCommerce.
WooCommerce is the official eCommerce plugin by WordPress and is the best way to set up an eCommerce site on WordPress.
It’s free and offers a lot of features that would make it easier for you to manage your store. Moreover, there are so many great WooCommerce addons that can help you extend the functionality of your eCommerce site.
A Multi-vendor Plugin
WooCommerce itself doesn’t come with the ability to create a multi-vendor marketplace. But thankfully there are so many WooCommerce add-on plugins that can do this job.
So, the last piece of the puzzle for your multi-vendor marketplace is a multi-vendor plugin. This plugin will allow you to turn your eCommerce site into a multi-vendor marketplace allowing sellers to sign up and sell their own products.
Moreover, a multi-vendor plugin will also help you set up a dashboard for sellers, view reports, and more.
Now that you know all about the requirements of setting up a multi-vendor marketplace in WordPress, let’s start building it.
Step #1: Get Domain & Web Hosting
There are many web hosting providers from where you can buy a domain name and web hosting.
I always recommend Bluehost as it’s the best web hosting for creating an eCommerce site. It’s also the official partner of WooCommerce which we’ll be using to create our multi-vendor marketplace.
On top of that, you get a free SSL certificate with Bluehost which is important for security. If you’re building an eCommerce site, an SSL certificate is a must.
Lastly, Bluehost is also very affordable which makes it the perfect choice for anyone starting a website online.
Let’s get a domain and web hosting from Bluehost. Visit Bluehost and click on the ‘Get Started’ button.
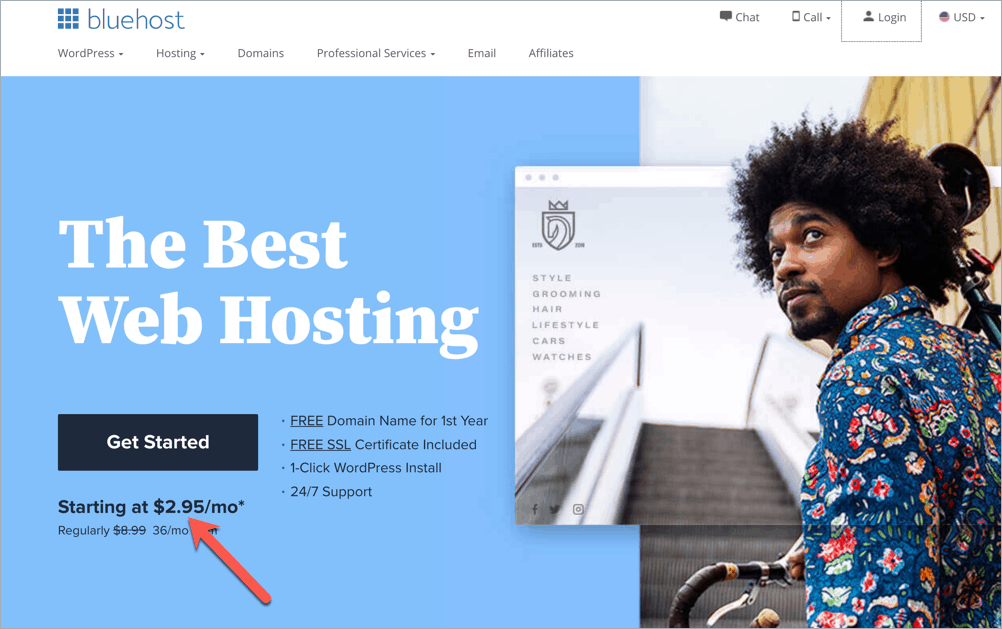
This is a promo link that will get you a discount on your web hosting purchase. Usually, the price is $8.99/month but with our promo discount link, you’ll get it for just $2.95/month.
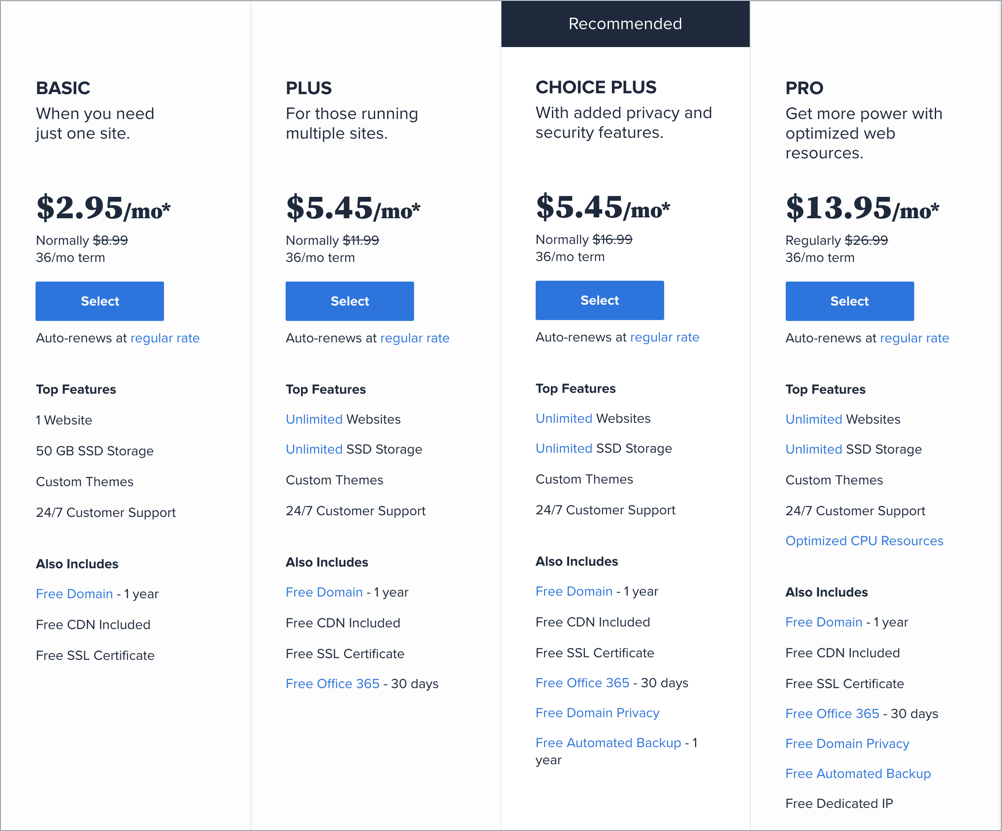
Now, you’ll have to choose a plan. I recommend choosing the Basic plan since you’re just starting out. You can always upgrade later on when your requirements increase.
After choosing your plan, it’s time to choose a domain name. One of the reasons why I recommend Bluehost is that you get a free domain name with their web hosting.
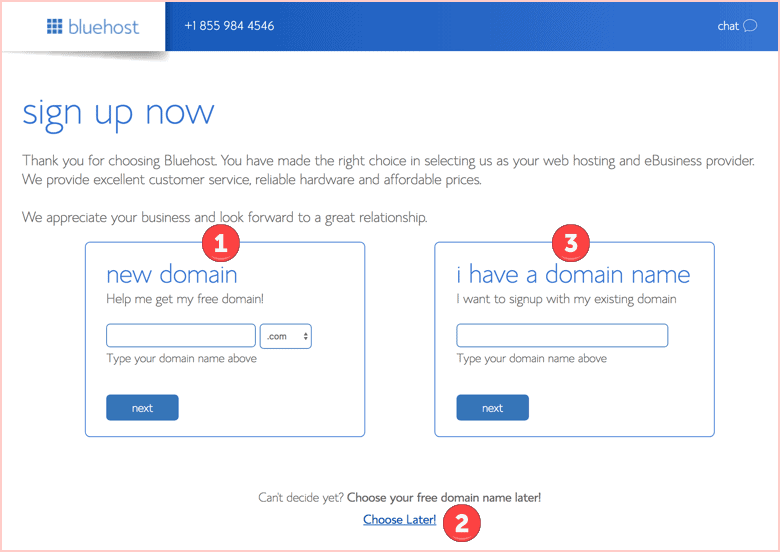
Enter the domain name you want for your multi-vendor marketplace. If you’re having trouble choosing a domain name, take a look at our article where we share some tips for choosing the right domain name.
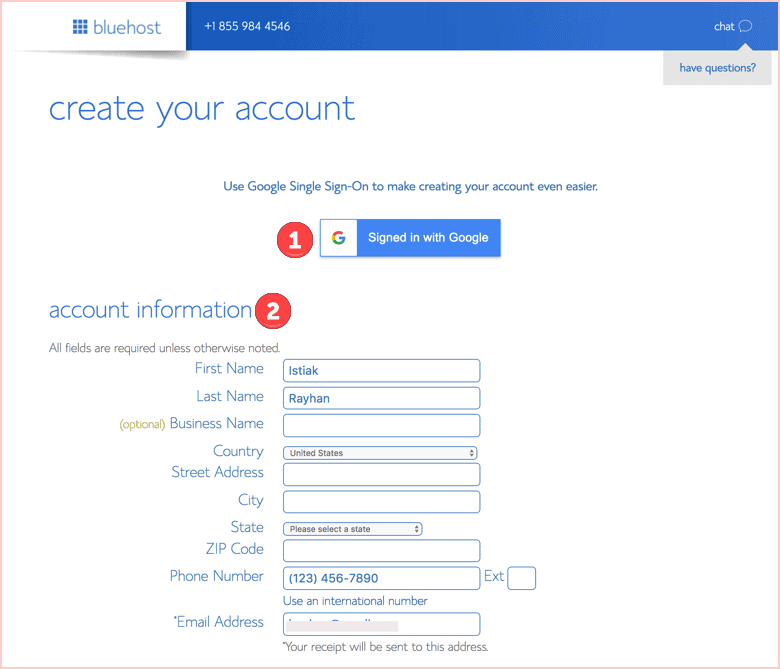
After entering the domain name, you’ll be asked to fill in your account information. You can either enter your information or sign in with Google.
In the next step, you’ll see your package information. Here, you’ll find several add-ons checked on that you can disable if you don’t need them.
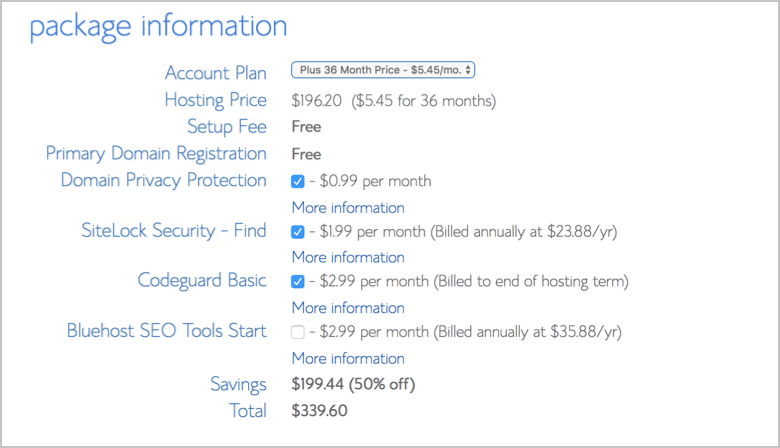
Do review your package information before moving on to the next step. Once you’ve reviewed it and proceed further, you’ll be asked to enter your payment details. You can either pay with PayPal or using a credit card.
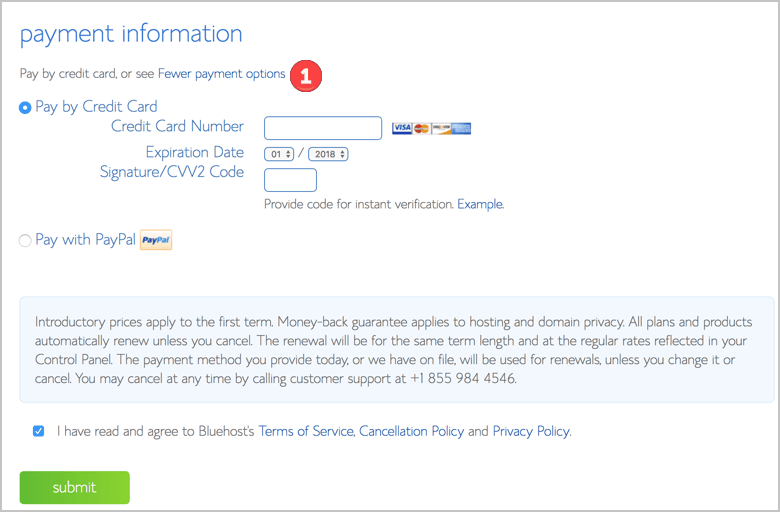
Choose your desired payment method and click on the ‘Submit’ button to purchase your web hosting and domain.

After the payment is successfully completed, your Bluehost account will be created. You’ll just have to create a password and log in to your account.
Step #2: Install WordPress On Your Host
The next step is to install WordPress on your hosting. One of the best things about Bluehost is that it automatically installs WordPress on your host.
Just log in to Bluehost and you’ll be asked to select a WordPress theme. Don’t worry about the theme you select as it can be changed later on.

Select a theme and click on the ‘Start Building’ button to install WordPress automatically.

Once the installation is finished, you’ll be redirected to the WordPress dashboard and see this:
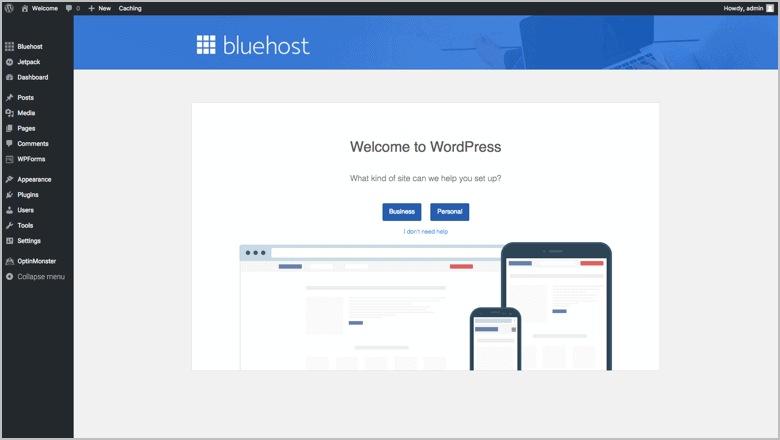
Bluehost will help you set up your WordPress site by asking a few questions. First of which is to select if your website is Personal or Business. Since we’re building a multi-vendor eCommerce site, choose Business.
Then, you can either launch your site or create pages or posts.

WordPress has now been successfully installed on your website and you’re ready to move on to the next step.
Step #3: Install WooCommerce On Your WordPress Site
Once WordPress is successfully installed on your website, it’s time to install WooCommerce on your website.
From your WordPress dashboard, go to Plugins > Add New. Then, search for ‘WooCommerce’ and you’ll find the WooCommerce plugin at the top. Click on the Install button and then the Activate plugin once it’s installed.

Once WooCommerce is activated, you’ll be redirected to the WooCommerce setup wizard. First, you’ll have to enter your store details.

Next, select the industry you’re in.

Then, you’ll be asked to choose the product types you’ll be selling in your store.

After that, select the type of your business. Here, you’ll have to select how many products you plan to display and whether you sell products elsewhere.

Lastly, you’ll have to select the theme for your eCommerce store. Again, you can either continue with your current theme and change it later on or you could choose a theme from the list of themes.

That’s it. You’ve successfully set up WooCommerce. You can go even further by customizing and personalizing various settings.
But for now, let’s leave it at that and add a multi-vendor plugin for your website.
Step #3: Install A Multivendor WooCommerce Plugin
The third step is choosing and installing a multi-vendor WooComemrce plugin for your marketplace.
We have discussed many WooCommerce multi-vendor plugins in the past but the one we recommend the most is Dokan Multi-Vendor.
This is because Dokan is the king of multi-vendor plugins for WooCommerce with the highest number of installations for any WooCommerce multi-vendor plugin. It comes with so many different features that would make it so easy for you to manage your multi-vendor marketplace.
Here are some key features of this plugin:
- Independent stores for sellers
- Works with any theme
- Dashboard for sellers and customers
- Earn commission for each product sale
- Coupon management
- Detailed reports and statistics
- Product reviews
- Shipping management
- Multilingual
- Send announcements and notifications to vendors
- Comes with a mobile app
Dokan Multi-vendor is a free plugin but also comes with premium plans that offer more features and extensive customization.
Here’s the pricing of Dokan:

If you’re just setting up your multi-vendor marketplace, then you can choose the free plan. But if you’re serious about it and want high functionality and features for your store, the Starter plan is perfect.
To install Dokan, go to Plugins > Add New and search for ‘Dokan’ and install the plugin.

Step #4: Configure Your Marketplace
Once you install and activate the plugin and you’ll be taken to a page with the setup wizard. Let’s configure the Dokan plugin now.

First, you’ll have to set the store URL along with other settings such as shipping fee recipient, tax fee recipient, and more.

In the Selling section, enable the ‘New Vendor Enable Selling’ option to allow newly registered vendors to sell their items.

You can also set the commission type and the amount of commission you’ll receive for each product sale.
Next up are the Withdraw settings where you can set the withdrawal methods and the minimum amount limit for withdrawals.

After these settings, Dokan will recommend a few plugins to help you enhance the experience of your marketplace. You can choose to disable or enable these plugins.

That’s it then. Your multi-vendor marketplace is ready!

You can go ahead and visit your Dokan dashboard where you can see all your vendors, sales, and commission earned.
Once your Dokan marketplace is fully ready, you can open it for vendors to register and sell their products.
You can even customize the vendor store by adding a banner, store photo, description, address, and more.

Dokan also lets you control the payment options for each vendor in your marketplace. You can set custom commission rates and commission types for each vendor.

This is something you won’t find in other multi-vendor plugins. This is why Dokan is so special.
You can configure your store even further if you have the pro version of the plugin installed.
For instance, you can enable various Dokan extension modules for additional functionality. There are modules for color customization, auctions, geolocation, live chat, Elementor compatibility, and more.

With these modules, you can fully enhance the experience of your marketplace for both sellers and customers.
Conclusion
Setting up a multi-vendor marketplace isn’t as complex as it seems. With the right tools, you can easily create a highly advanced multi-vendor marketplace with all the bells and whistles.
In this guide, we learned how you can create your own multi-vendor marketplace in WordPress using WooCommerce and Dokan Multivendor plugin.
As evident from the guide, these plugins have made it so easy to set up your store and configure it in any way you want.
Now, it’s your turn. Go ahead and start building your first multi-vendor marketplace like Amazon and eBay.
I hope this guide will help you in every step of your eCommerce journey. But if you ever have any questions or doubts, feel free to comment below and ask your questions.
I’d be happy to answer your questions to help you set up your multi-vendor marketplace in WordPress using WooCommerce and Dokan multivendor plugin.
Leave a Reply